Thursday, December 8, 2011

Immaculate Conception and Cookies!

As Catholics, today is the feast of the Immaculate Conception, and so we decided to have a party for our homeschool group since most of celebrate this feast! We started the day off with a little bit about Mary and how God created her without sin from the start! He did this as a special grace for the mother of his son. Then we prayed together and headed down to the art studio for a craft!


Mrs. L arranged a really beautiful Christmas candle craft for each family to make! It was really simple and so pretty! We had some tall candles and we used Mod Podge to decoupaged the outside with blue tissue paper! We also had Mary, Joseph, and Baby Jesus to use around the outside edge of the candle, and some kids chose to sprinkle glitter on the outside edge! They all turned out so well and I love how very dedicated they all were in placing the paper just so! They all worked really hard to make their special candle to light on Christmas!
The little ones made a picture with glue and paper!


Here is LS picture.

Here is RM's picture

SL made this picture!

Here is a finished candle that one of the kids made! Aren't they pretty!

After our candles were all done, and drying, the kids had some cupcakes, while the moms exchanged some cookies! Yum! We all brought 2 dozen and everyone went home with several of each kind! Its always fun to taste everyone elses cookies and what they are like! There were some really yummy ones!

Cupcakes!!!!!

And Cookies!!!!


And Snow time fun!

The kids had a wonderful time crafting, snacking, and playing together! We moms had a good time talking! :) It is so wonderful to take the time to get together and take some time to relax! I hope everyone is enjoying their holiday preparations! Happy Schooling to you all!

Wednesday, November 30, 2011

Advent Jesse Tea!

Well today we had a little seasonal fun....Advent season that is! We really wanted to have a chance to remember what the Christmas season is all about! So Mrs. L found a really amazing tea party that was focused around the Jesse Tree. The Jesse tree is a way to remember the historical events that lead up to the birth of Christ. This tea party wasn't just tea and crumpets however, each food represented a different part of the Jesse Tree. We started off by reviewing the Jesse tree with a felt board version of it. Mrs.L did a great job telling the stories, and everyone there did a great job helping remember all the details!


After that we all sat down for tea! It looked (and tasted) amazing! Here are a few pictures of the food and what they represent (they aren't all in order)!
Here is the tea already to serve!

Jesse Tea, and the Apple for Adam and Eve.

Joseph's Coat of Many Colors

Noah's ark animals and rainbows

Stars for the descendants of Abraham

Bundles of Sticks for Abraham almost sacrificing his son

Burning Bush (Moses)

10 Commandments

Johna and the "whales"

Root of Jesse

Bread for the "City of Bread" for Bethlehem

Honey for St. John the baptist

Angles told Mary she would have a baby!

White cookies for the purity of Jesus and red for the sacrifice he would make!

Here are the older girls organizing the food in historical order!

Everyone thought the tea was amazing! Yum!

It really was a fun, special, and memorable way to start off the advent season!!!! Thanks so much to Mrs.L for planning and hosting this, and to everyone who came and helped make it special! Happy Advent!

Tuesday, November 29, 2011

Knitted Bracelet Showcase!


Today KL is back with a really pretty Bracelet she made all by herself!!! I think that she did an amazing job and I know you will too! Let us know what you think of it by leaving a comment below! So without further ado, here is KL!

My Knitted Bracelet

Just for fun I knitted a bracelet. I wanted to make one ever since I saw them in a knitting book we got out from the library. My mom helped me to figure out how to knit it. Here is how I made it.

I used size three double pointed knitting needles, some striped sock yarn, six small orange beads and a big crystal bead. We cast on five stitches. I knitted six rows and then I put a small orange bead on. I did this by knitting two stitches and taking the third stitch off with small crochet hook that had a small orange bead on it. Then I slipped the bead onto the third stitch. This is harder than it sounds. I did this about six times until it fit around my wrist. My mom tied it off and put the big crystal bead on for me, so I can button or unbutton it. This bracelet is very pretty, but if you get it wet, it will stretch out and smell like wet dog!


KL that is an amazingly cute bracelet and I love it! Thanks so much for sharing! I am so happy to have your post! If anyone has some work they would like to share with everyone, send me an email! Happy Schooling!


Friday, November 18, 2011

DIY Science Expirment~ by JL age 15

I am so excited to post a great science experiment done by JL! He has written it up with pictures so that you can try it too!!!!!

Experiment 3.1~ How a Barometer works


Supplies :
Large Mason Jar
Tea light candle
Candle holder
Matches
Clear flat bowl
Water
Food coloring


I first took the clear flat bowl and filled it with a very little water so it was about a quarter of a inch full.
then I put the mason jar in the bowl to double check if there was enough water. After that I put food coloring in the bowl dyeing it red. Next I put the candle in its holder and placed it in the water, I lit the candle with the match and covered it with the Mason jar.


When I covered the candle with the Mason jar the flame started to slowly dim until it finally went out.
While the flame burned up the oxygen in side the jar the water had to seep into the jar to even out the air pressure, so that there was a even pressure inside the jar and outside it.


The first time I performed the experiment I did not have enough water to even out the pressure, so I had to put more water in to the bowl so it worked. This experiment shows how a barometer works. After I observed what happen I cleaned everything up and put it away.


That is really cool! Thanks so much for sharing with is JL! I love that you sent pictures too! Keep up the great work and maybe we'll see another experiment soon! Remeber if your kids have done some great work, please send me a picture and a small paragraph all about it! We love to see what you have been up to! Happy Schooling!


Thursday, November 17, 2011

Stone Soup Party!

Today was our first annual Stone Soup party and it was great! Everyone was invited to bring an ingredient for our soup as well as a small gift for Operation Christmas Child. Operation Christmas Child collects small items packed into a shoebox to give to impoverished children. Its an awesome ministry and a lot of fun for kids to help get in the spirit of giving!
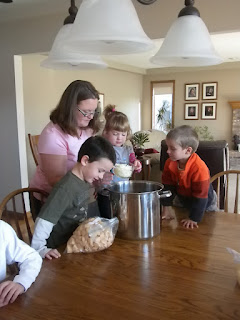
We started out time together by getting our pot out and reading the stone soup story! We read the version by Marcia Brown and took some time to talk about how working together can have big results! As we read the kids all added their ingredients to the pot! :) It was a lot of fun and the kids had a good time making soup!


After the moms got the pot on the stove, the kids did a small craft where they tore paper to make a soup pot and then they filled it with paper torn veggies! :) The bigger kids were good enough to wrap the shoe boxes for us! ;) After that we put the boxes together to get ready to ship! We made a couple of kids boxes and teen girl box. They turned out really well!


We ended our day with amazing soup as well as homemade wheat bread, beer bread, Carmel apples, and pumpkin cookies! It was so yummy! Then the kids played inside, outside, and in the few snow flurries that came our way (the kids were SUPER excited about the snow!).


 It was a really great day, and a wonderful way to head us into the holidays! Thanks to all of you who came and helped put this all together!